Singer offers a wealth of free downloadable instruction manuals, covering various domestic and industrial models. These resources aid in understanding and maintaining these classic machines.
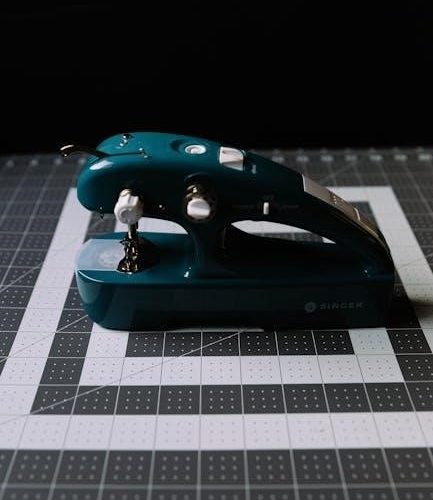
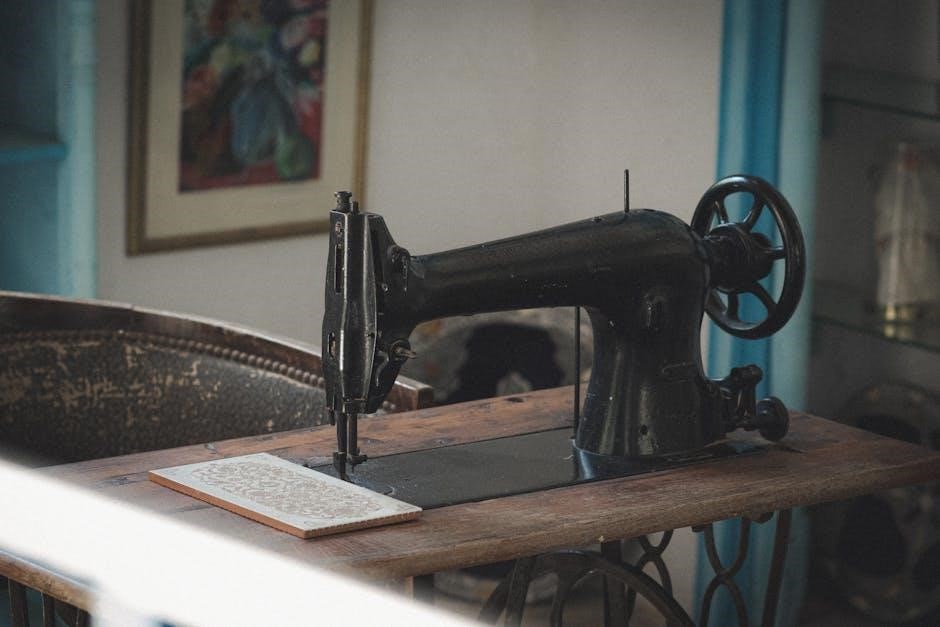
SINGER machines have been a cornerstone of sewing for over 160 years, designed for all skill levels, fostering creativity and DIY projects.
Historical Significance of Singer
Singer revolutionized home sewing in the mid-19th century, transitioning it from a laborious task to a more accessible pursuit. The availability of instruction manuals, even for early models, empowered users to learn and maintain their machines independently.
These manuals weren’t just guides; they represented a democratization of sewing knowledge. Singer’s enduring legacy stems from its commitment to quality and user support, evidenced by the continued availability of resources like downloadable manuals today. The brand fostered a culture of creativity and self-sufficiency, impacting fashion and domestic life profoundly;
Identifying Your Singer Model
Locating the correct instruction manual begins with accurately identifying your Singer model. Look for a nameplate, typically found on the front or side of the machine. This plate displays a model number (e.g;, 66, 201, 401) crucial for finding the corresponding manual.
Singer produced numerous variations, so precise identification is key. Online resources and forums can assist if the plate is damaged or illegible. Once identified, accessing the free downloadable manuals becomes significantly easier, unlocking a wealth of information for operation and repair.
Dating Your Singer Sewing Machine
Determining the age of your Singer can be helpful, though instruction manuals don’t directly provide this. Serial numbers, found on the machine’s body, are key. Websites dedicated to Singer serial number databases can estimate the manufacturing year.
However, serial number dating isn’t always precise due to production overlaps. Knowing the model number, combined with the serial number, offers the most accurate timeframe. This information aids in sourcing period-correct parts and understanding the machine’s original features.
Understanding the Basic Parts
Instruction manuals detail each component – from the handwheel to tension disks – explaining their function and interaction for smooth sewing operation.
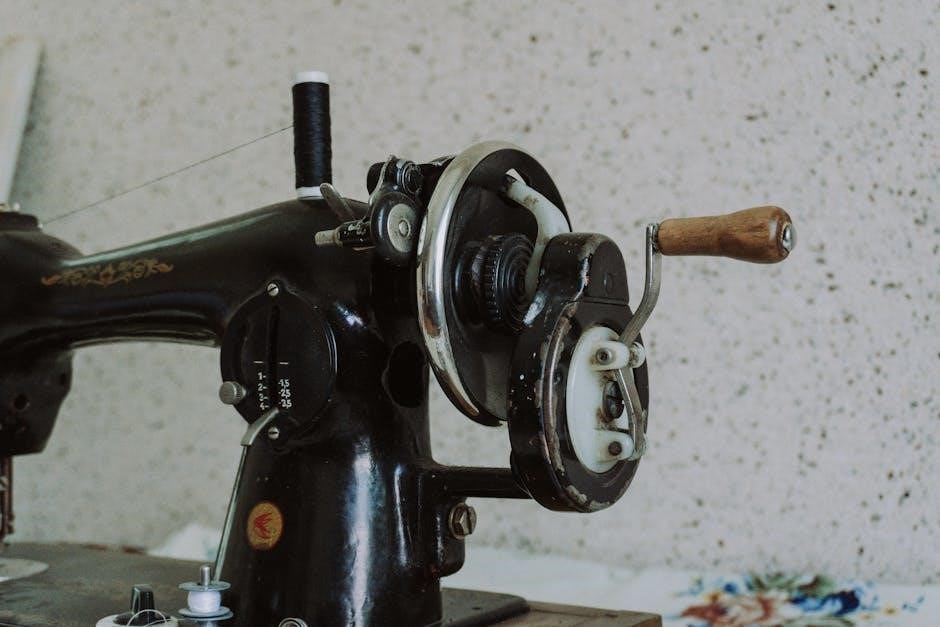
The Handwheel and its Function
Singer sewing machine instruction manuals consistently emphasize the handwheel’s crucial role. Rotating it clockwise lowers the needle, creating stitches, while counter-clockwise raises it.
Manuals illustrate how controlled handwheel turns are essential for precise stitching and navigating fabric corners. They also caution against forcing the wheel, as it can damage internal mechanisms. Understanding its function, as detailed in the guides, ensures proper machine control and longevity.
The Bobbin Winder
Singer sewing machine instruction manuals dedicate sections to the bobbin winder, a vital component. These guides detail how to correctly position the spool and thread, engaging the winder mechanism.
Manuals illustrate the importance of even winding, preventing uneven tension during sewing. They often include diagrams showing the correct thread path and winding pressure adjustments. Proper bobbin winding, as explained, is crucial for consistent stitch quality and avoiding machine malfunctions.
Needle and Presser Foot Mechanisms
Singer sewing machine manuals thoroughly explain the needle and presser foot systems. They detail needle types for different fabrics, emphasizing correct insertion and securing. Diagrams illustrate how the presser foot regulates fabric feed, ensuring even stitching.
Instructions cover adjusting presser foot pressure for varied materials, preventing puckering or slippage. Manuals also explain how to remove and reattach these components for cleaning or replacement, vital for maintaining optimal sewing performance.
Tension Disks and their Role
Singer sewing machine manuals dedicate sections to tension disks, crucial for balanced stitch formation. They explain how these disks control thread flow, impacting stitch quality. Diagrams illustrate adjustment methods, addressing issues like looping or puckering.
Manuals detail recognizing tension problems – too tight or too loose – and provide step-by-step solutions. Proper tension ensures consistent stitches, preventing thread breakage and fabric distortion, vital for successful sewing projects.
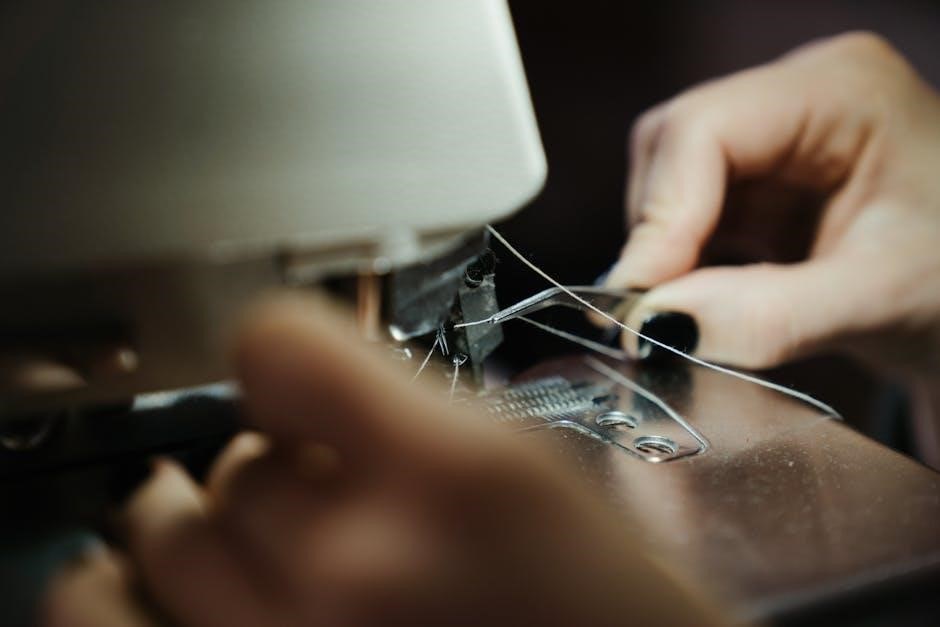
Threading the Machine
Singer manuals provide detailed diagrams for both upper and lower threading. They illustrate bobbin winding and insertion, emphasizing correct path for optimal performance.
Threading the Upper Thread
Singer manuals meticulously guide users through upper threading, starting with the spool pin and progressing through tension disks and take-up levers. Detailed illustrations demonstrate the correct thread path, crucial for preventing skipped stitches and ensuring even tension.
These guides emphasize following the numbered sequence precisely, often including diagrams showing how to navigate the thread through guides and around the shuttle hook. Proper threading is foundational for successful sewing, and the manuals prioritize clarity for both beginners and experienced sewists.
Winding and Inserting the Bobbin
Singer manuals provide clear instructions for bobbin winding, utilizing the bobbin winder attachment. They detail how to position the spool and thread, engage the winder, and achieve an even fill.
Insertion guidance emphasizes correct bobbin placement within the bobbin case, ensuring smooth feeding. Diagrams illustrate the proper orientation and how to navigate the thread through the tension spring. Following these steps prevents issues like thread nests and inconsistent stitch formation.
Proper Thread Tension Adjustment
Singer manuals explain that correct thread tension is crucial for balanced stitches. They detail how to identify tension problems – loops on top or bottom – and adjust the tension dial accordingly.
Instructions emphasize testing adjustments with scrap fabric. The goal is a balanced stitch where the top and bobbin threads interlock evenly in the fabric’s middle layers. Improper tension leads to skipped stitches or puckering, hindering project quality.
Stitch Selection and Adjustment
Singer manuals illustrate stitch length and width adjustments, detailing common stitch types available on vintage models for diverse sewing applications and creative projects.
Understanding Stitch Length
Vintage Singer manuals explain that stitch length directly impacts fabric strength and appearance. Shorter stitches are ideal for delicate fabrics and curves, creating a denser, more secure seam. Conversely, longer stitches suit heavier materials like denim or canvas, offering greater flexibility and speed.
Adjusting stitch length typically involves a dial or lever on the machine, allowing precise control. Singer guides emphasize testing stitch length on scrap fabric before starting a project to ensure optimal results and prevent puckering or breakage.
Adjusting Stitch Width
Vintage Singer manuals detail how stitch width controls the breadth of zigzag or decorative stitches. A narrower width creates a straight stitch, while increasing it produces wider zigzag patterns. This adjustment is crucial for various techniques, including overcasting raw edges and creating decorative embellishments.
Singer guides illustrate that width is often adjusted via a separate dial or lever. Experimentation on scrap fabric is recommended to achieve the desired effect, ensuring the stitch doesn’t pull or distort the material.
Common Stitch Types on Vintage Singers
Vintage Singer manuals showcase a range of stitches, primarily focusing on the straight stitch, essential for garment construction. Zigzag stitches, adjustable in width, were common for finishing edges and decorative work. Many models also featured buttonhole stitches, often requiring specific attachments.
SINGER resources highlight that older machines may offer variations of these basic stitches, alongside specialized options depending on the model. Understanding these capabilities unlocks creative potential.

Maintenance and Cleaning
Singer manuals emphasize regular oiling and lint removal to ensure smooth operation. Consistent cleaning prevents jams and maintains the machine’s longevity and performance.
Oiling Your Singer Machine
Singer manuals consistently highlight the importance of proper lubrication for optimal performance and longevity. Use a high-quality sewing machine oil, applying it sparingly to all moving parts – as detailed in your specific model’s guide.
Focus on areas like the bobbin winder, shuttle hook, and any points where metal parts interact. Avoid over-oiling, as excess oil attracts lint and debris. Regularly oiling prevents friction, reduces wear, and ensures smooth, quiet operation, extending the life of your vintage Singer.
Cleaning Lint and Debris
Singer manuals emphasize regular cleaning to maintain sewing quality. Lint and debris accumulate, hindering smooth operation. Use a soft brush to remove lint from the bobbin area, feed dogs, and around the needle plate.
A small vacuum cleaner attachment can also be helpful. Thorough cleaning prevents jams, ensures accurate stitching, and prolongs the machine’s life. Consistent maintenance, guided by your model’s manual, keeps your vintage Singer performing beautifully.
Belt Replacement Procedures
Singer manuals detail belt replacement, crucial for restoring power transmission. Begin by disconnecting the power. Access the belt, often behind a cover plate, and carefully remove the old belt.
Install the new belt, ensuring proper alignment around the motor and handwheel pulleys. Refer to your specific model’s diagram for correct routing. Reattach the cover plate and test the machine. A correctly installed belt restores smooth, efficient sewing operation.
Troubleshooting Common Issues
Singer manuals offer solutions for problems like needle breakage, thread bunching, and skipped stitches, guiding users through diagnostics and repairs for optimal performance.
Needle Breaking Problems
Singer manuals frequently address needle breakage, a common issue with vintage machines. They emphasize using the correct needle type and size for the fabric weight. Incorrect threading, a bent needle, or forcing the fabric can cause breaks.
The manuals also detail checking the needle plate to ensure it’s properly aligned and the screw is tight. Improper timing or a damaged needle bar can also contribute. Always refer to your specific model’s manual for detailed diagrams and troubleshooting steps to prevent further damage.
Thread Bunching Underneath Fabric
Singer manuals pinpoint thread bunching as often stemming from improper lower threading or bobbin insertion. Ensure the bobbin is wound evenly and inserted correctly, following the diagram in your manual. Incorrect tension, particularly the upper tension, is another frequent cause.
The manuals advise re-threading both the upper thread and bobbin, verifying the thread path is clear. A dirty or damaged bobbin case can also lead to bunching. Consult your model’s manual for specific cleaning and adjustment instructions.
Skipped Stitches – Causes and Solutions
Singer manuals identify several causes for skipped stitches. A dull or incorrectly inserted needle is a primary culprit; replace it with the correct type and ensure it’s firmly seated. Incorrect threading, particularly of the upper thread, can also cause issues.
The manuals emphasize checking the timing of the machine, a more complex adjustment best left to a qualified technician. Finally, using the wrong type of thread or fabric can contribute to skipped stitches. Refer to your manual for recommended materials.
Machine is Jamming
Singer manuals detail that jamming often stems from improper threading, particularly around the tension disks or bobbin area. Ensure thread flows freely without obstruction. Accumulated lint and debris are frequent causes; regular cleaning, as outlined in the manual, is crucial.
Incorrectly installed or wound bobbins can also lead to jams. The manual stresses using the correct bobbin size and winding it evenly. If jamming persists, consult a technician, as internal component misalignment may be present.
Advanced Techniques
Singer manuals showcase techniques like free-motion sewing and darning, utilizing specialized feet. Mastering these expands creative possibilities with vintage machines.
Free Motion Sewing
Vintage Singer manuals don’t always explicitly detail free-motion sewing, a technique popularized later; However, understanding the machine’s core functions—like disengaging the feed dogs—is crucial. Many resourceful sewists adapt by referencing online tutorials and communities.
These resources demonstrate how to lower the feed dogs (often requiring a specific screwdriver) and use a darning foot to achieve free-motion control. The Singer manuals emphasize proper tension adjustment, vital for consistent stitches during this advanced technique. Experimentation and practice, guided by supplemental materials, unlock creative quilting and embellishment possibilities.
Darning with a Singer Machine
Vintage Singer manuals frequently dedicate sections to darning, a vital repair skill. They illustrate using a darning foot, which rocks back and forth, creating a woven repair over holes or worn areas. Instructions detail lowering the feed dogs and adjusting stitch length for optimal results.
The manuals emphasize using appropriate thread weight and tension for a seamless darn. While modern resources expand on decorative darning, the core principles remain consistent with Singer’s original guidance, preserving garments and textiles through skillful repair and extending their lifespan.
Using Different Types of Feet
Vintage Singer manuals showcase a remarkable array of specialized presser feet. These attachments, often included in accessory kits, expanded the machine’s capabilities beyond basic sewing. Manuals detail the purpose of each foot – from the ruffler for creating gathers to the hemmer for neat edges.
Illustrations demonstrate proper foot attachment and usage techniques. Singer designed feet for specific tasks like buttonholes, zippers, and decorative stitching. Understanding these feet, as outlined in the manuals, unlocks the full potential of these versatile machines.
Finding Manuals and Resources
Numerous online sources offer free Singer manual downloads for domestic and industrial machines, aiding in repair and operation of vintage models.
Singer provides extensive resources, including manuals, to ensure a successful and easy sewing experience for all users.
Free Online Singer Manual Downloads
Locating original manuals for vintage Singer sewing machines is now remarkably accessible thanks to numerous online archives. Websites dedicated to preserving sewing machine history offer free PDF downloads for a vast range of models, including the 6SS, 7-33, 7 CLASS, and 11-17.
These digital resources are invaluable for understanding the specific features and operation of your machine. You can find manuals detailing everything from threading procedures to troubleshooting common issues. Singer also provides downloadable manuals for newer models like the Start 1306 and Tradition series, expanding the available support.
Always ensure the manual corresponds to your machine’s serial number for accurate instructions.
Singer Sewing Machine Forums and Communities
Beyond downloadable manuals, vibrant online forums and communities dedicated to vintage Singer sewing machines offer a wealth of knowledge. These platforms connect enthusiasts who readily share expertise, troubleshooting tips, and even scanned copies of rare instruction manuals.
Members often assist with identifying models, dating machines, and interpreting complex diagrams found within the manuals. Singer’s brand loyalty fosters a supportive environment where questions are welcomed, and collaborative problem-solving thrives. These communities are invaluable resources when a physical manual is missing or incomplete.
Engage with fellow enthusiasts to unlock your machine’s full potential!
Repair Services for Vintage Singers
While instruction manuals provide guidance, complex repairs often necessitate professional assistance. Numerous repair services specialize in vintage Singer sewing machines, offering expertise beyond what a manual can convey. These technicians possess in-depth knowledge of these machines’ mechanics and can source original or compatible parts.
Finding a skilled repairperson is crucial, especially for electrical issues or intricate mechanical problems. Singer’s enduring quality means many parts are still available, but a professional can ensure correct installation and safe operation. Don’t hesitate to seek help when needed!
Restoration and Repair
Manuals guide disassembly for part replacement, polishing, and refinishing. However, electrical work demands caution and expertise; professional repair is often recommended.
Replacing Worn Parts
Singer sewing machine manuals are invaluable when disassembling machines to replace aged components. They detail removal of covers – the sewing table, face plate, and base – providing clear steps. Identifying the correct replacement part is crucial; online forums and communities can assist with sourcing.
Carefully follow the manual’s instructions to avoid damaging other parts during disassembly. Remember to lubricate new parts before reassembly, ensuring smooth operation. Prioritize safety and consult a professional if unsure about any step.
Polishing and Refinishing
While Singer manuals don’t directly cover cosmetic restoration, careful cleaning is essential before polishing. Disassemble components as outlined in the manual, protecting delicate parts. Use appropriate metal polishes for the machine’s finish – black enamel requires different treatment than nickel plating.
Refinishing may involve careful stripping and repainting, best left to experienced restorers. Always test polishes in an inconspicuous area first. A beautifully restored machine honors Singer’s legacy.
Electrical Issues and Safety
Singer manuals emphasize power cord inspection for damage before each use. Never operate a machine with a frayed or damaged cord. Electrical repairs should only be undertaken by a qualified technician; attempting DIY repairs is extremely dangerous.
Vintage machines may lack modern grounding, increasing shock risk. Disconnect the machine from power before any maintenance, as detailed in the manual. Prioritize safety – a malfunctioning electrical system is a serious hazard.
Safety Precautions
Singer manuals stress safe needle handling and disconnecting the machine before maintenance. Inspect the power cord regularly for damage, ensuring safe operation.
Safe Needle Handling
Singer sewing machine manuals consistently emphasize the importance of careful needle handling. Always disconnect the power supply before changing or working near the needle. Use the correct needle type and size for your fabric to prevent breakage and potential injury.
Dispose of used needles responsibly, ideally in a designated sharps container. Never attempt to sew over a broken needle, as this can cause damage to the machine and pose a safety hazard. Always insert the needle correctly, ensuring it is fully secured in the needle clamp.
Power Cord Inspection
Singer manuals strongly advise regular inspection of the power cord for any signs of damage, such as fraying, cracking, or exposed wires. A damaged cord presents a serious electrical shock hazard and should never be used.
If damage is detected, immediately discontinue use and have the cord replaced by a qualified technician. Avoid bending or twisting the cord excessively, and keep it away from heat sources. Ensure the plug fits securely into the outlet.
General Machine Safety
Singer manuals emphasize keeping fingers and other body parts clear of the needle, presser foot, and other moving components while the machine is operating. Always disconnect the power supply before performing any maintenance or repairs.
Never force the fabric; let the machine feed it smoothly. Ensure the machine is placed on a stable, level surface during use. Keep the area around the machine clean and free of obstructions.
Accessories for Vintage Singers
Original Singer attachments enhance functionality, while modern compatible accessories expand capabilities. Manuals often detail proper accessory usage for optimal sewing results.
Original Singer Attachments
Vintage Singer machines boasted a remarkable array of specialized attachments, often detailed within their respective instruction manuals. These weren’t merely add-ons; they significantly expanded the machine’s versatility.
From hemmers and gatherers to decorative feet and even specialized attachments for embroidery, these original accessories allowed sewists to tackle a wider range of projects. The manuals illustrate proper installation and usage, unlocking the full potential of each attachment. Locating these original pieces, alongside the corresponding manual, is key to experiencing authentic vintage sewing.
Modern Compatible Accessories
While original Singer attachments are prized, many modern sewing machine accessories are compatible with vintage models, expanding creative possibilities. Adapters allow for the use of contemporary presser feet, offering features like ¼-inch quilting or blind hemming;
However, always consult your machine’s instruction manual and online resources to ensure compatibility and avoid damage. Careful research is crucial, as not all modern accessories will fit or function correctly. Utilizing these modern additions can breathe new life into a classic machine.
Finding Replacement Parts
Locating replacement parts for vintage Singer machines can be challenging, but several avenues exist. Online marketplaces often host sellers specializing in vintage sewing machine components. Dedicated Singer forums and communities are invaluable resources for locating hard-to-find items and advice.
Furthermore, repair services frequently stock or can source original parts. Always reference your machine’s instruction manual for part numbers when searching. Patience and diligent research are key to successfully restoring your vintage Singer.

Resources for Further Learning
Online video tutorials and books dedicated to vintage sewing machine repair complement instruction manuals. Local repair shops offer expert guidance too.
Online Video Tutorials
Numerous online platforms host video tutorials demonstrating the operation and repair of vintage Singer sewing machines. These visual guides often supplement the information found in instruction manuals, providing a practical understanding of threading, maintenance, and troubleshooting.
Many sewists share their expertise, showcasing techniques like belt replacement or tension adjustments. Searching for specific model numbers alongside terms like “repair” or “maintenance” yields targeted results. These resources are invaluable for visual learners and those seeking step-by-step guidance beyond the written word.
Books on Vintage Sewing Machine Repair
Dedicated books offer comprehensive guides to restoring and repairing vintage Singer sewing machines, often expanding upon the basic information in original instruction manuals. These publications delve into detailed mechanical explanations, troubleshooting complex issues, and sourcing replacement parts.
They frequently include exploded diagrams and detailed photographs, aiding in disassembly and reassembly. These resources are particularly useful for those undertaking more extensive restoration projects, providing a deeper understanding of the machine’s inner workings beyond simple operation.
Local Sewing Machine Repair Shops
While online resources like downloadable instruction manuals are valuable, a local sewing machine repair shop provides hands-on expertise. Skilled technicians can diagnose issues beyond what a manual covers, offering repairs and maintenance tailored to your specific Singer model.
They often possess a wealth of knowledge regarding vintage machines, including sourcing hard-to-find parts and offering advice on restoration. A local shop complements online resources, providing a practical solution for complex repairs or when you need personalized guidance.