Cub Cadet Blade Replacement Instructions: A Comprehensive Guide
Maintaining your Cub Cadet mower involves several key tasks, and blade replacement is paramount. This guide provides comprehensive, step-by-step instructions, ensuring a safe and effective blade replacement process. Properly maintained blades are essential for a clean and healthy lawn.
Welcome to the essential guide on replacing the blades of your Cub Cadet mower! Maintaining sharp, undamaged blades is crucial for achieving a healthy and well-manicured lawn. Over time, mower blades become dull, bent, or damaged from impacts with hard objects. This reduces the efficiency of your mower, leading to uneven cuts and potential lawn damage.
Replacing your Cub Cadet mower blades is a straightforward task that can significantly enhance the quality of your cut and the overall performance of your machine. This guide provides a detailed, step-by-step approach to safely and effectively replace your blades. We will cover everything from identifying when a replacement is needed to selecting the correct blades and properly installing them.
Whether you own a riding mower, lawn tractor, or zero-turn mower, this guide will provide the necessary information to confidently perform this routine maintenance task. By following these instructions, you can ensure your Cub Cadet mower continues to deliver optimal results, keeping your lawn looking its best. Remember, safety is paramount, so always adhere to the precautions outlined in this guide.
Identifying When to Replace Your Blades

Knowing when to replace your Cub Cadet mower blades is essential for maintaining a healthy and aesthetically pleasing lawn. Several key indicators suggest it’s time for a blade replacement. One of the most obvious signs is a visible reduction in cutting performance. If you notice that your mower is tearing the grass instead of cleanly cutting it, or if the lawn appears uneven and ragged after mowing, your blades are likely dull and need attention.
Physical damage to the blades is another crucial factor. Inspect your blades regularly for signs of bending, cracking, or significant dents along the cutting edge. A cracked blade poses a significant safety risk, as it can break apart during operation, potentially causing serious injury. Large dents and bends also affect the blade’s balance and cutting efficiency.

Additionally, excessive wear and tear on the blade’s cutting edge indicate that it’s time for a replacement. If the blade is significantly worn or has large dents, replace it immediately. Remember, sharp blades not only improve the quality of your cut but also reduce stress on the mower’s engine, prolonging its lifespan. Regular inspection and timely replacement of your Cub Cadet mower blades are vital for optimal lawn care.

Safety Precautions Before Starting
Before commencing any maintenance on your Cub Cadet mower, prioritizing safety is paramount. Blade replacement, while a straightforward task, requires strict adherence to safety guidelines to prevent potential injuries. First and foremost, always disconnect the spark plug wire from the spark plug. This crucial step ensures that the engine cannot accidentally start during the blade replacement process, eliminating the risk of serious injury.
Next, engage the parking brake to secure the mower and prevent any unintended movement. If your mower has a key, remove it from the ignition switch to further ensure that the engine remains off. Wear heavy-duty work gloves to protect your hands from sharp blades and potential cuts. Safety glasses are also essential to shield your eyes from debris that may dislodge during the process.
Work in a well-ventilated area to avoid inhaling any fumes or dust. Before lifting the mower deck, ensure that it is cool to the touch, preventing burns from hot engine components. Never place your hands or feet under the mower deck while it is in a raised position without proper support. By following these safety precautions diligently, you can safely and effectively replace your Cub Cadet mower blades, minimizing the risk of accidents and injuries.
Tools and Materials Needed
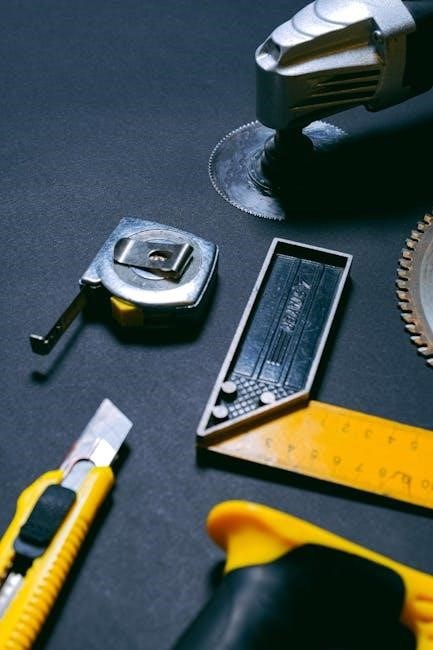
Before embarking on the blade replacement for your Cub Cadet mower, gathering the necessary tools and materials is essential for a smooth and efficient process. A socket wrench set is crucial, with a socket size typically around 15/16 inch, though it may vary depending on your specific model. Consult your operator’s manual for the correct socket size. You’ll also need a torque wrench to ensure that the blade bolts are tightened to the manufacturer’s specified torque, preventing loosening or damage.
A blade removal tool or a sturdy wooden block will be needed to immobilize the blades while loosening the bolts. A scraper or wire brush will help clean the mower deck of accumulated debris, ensuring a clean surface for reassembly.
Of course, you’ll need replacement blades that are compatible with your Cub Cadet model; verify the part number in your owner’s manual or on the Cub Cadet website. Work gloves are essential for protecting your hands from sharp edges, and safety glasses will shield your eyes from flying debris. Finally, a blade balancer is recommended to ensure that the new blades are properly balanced, reducing vibration and extending the life of your mower.
Step-by-Step Blade Removal
Begin the blade removal process by ensuring the mower engine is completely off and the spark plug wire is disconnected for safety. Position the mower on a flat, stable surface. Access the mower blades by either tilting the mower deck or removing the entire deck, depending on your Cub Cadet model. Consult your owner’s manual for the recommended procedure.

With the blades exposed, use a wooden block or a specialized blade removal tool to prevent the blade from rotating. Wearing heavy work gloves for protection, use a socket wrench to loosen the blade bolt. Remember, some bolts may have reverse threading, so check your manual. Apply steady pressure to avoid stripping the bolt head.
Once the bolt is loosened, carefully remove it, along with any washers or spacers. Gently detach the old blade from the spindle. Pay attention to the order of these components, as they must be reinstalled in the same sequence. Repeat this process for each blade on your mower deck. Before discarding the old blades, inspect them for wear, damage, or imbalance, as this can provide insights into potential issues with your mower.

Inspecting the Spindle and Deck
After removing the old blades, thoroughly inspect the spindles and mower deck for any signs of damage or wear. The spindle is a crucial component that holds the blade, and its condition directly affects the mower’s performance. Check for any play or looseness in the spindle bearings. If the spindle wobbles or feels rough when rotated, it may need to be replaced.
Examine the mower deck for cracks, rust, or bends. Pay close attention to the areas around the spindle mountings, as these are prone to stress and damage. Clean any accumulated grass clippings and debris from the deck surface using a wire brush or scraper. This will allow you to more easily identify any potential problems.
Look for signs of wear around the blade bolt holes. If the holes are elongated or damaged, it may indicate that the blades were not properly tightened in the past. Address any issues with the deck or spindles before installing the new blades. Repairing or replacing these components now will prevent further damage and ensure the safe and efficient operation of your Cub Cadet mower. Ignoring these issues can lead to uneven cutting, vibration, and potential safety hazards.

Selecting the Correct Replacement Blades
Choosing the right replacement blades for your Cub Cadet mower is crucial for optimal performance and lawn health. Start by consulting your owner’s manual to determine the exact blade specifications for your model. The manual will provide information on the required blade length, width, thickness, and center hole configuration. Using the wrong blade size can lead to improper cutting, damage to the mower deck, and potential safety hazards.
Consider the type of cutting you typically do. Mulching blades are designed to finely chop grass clippings and return them to the lawn as fertilizer. High-lift blades create a stronger upward airflow, which helps to stand the grass up for a more even cut and improves bagging performance. Standard blades are a good all-around option for general mowing;
When purchasing replacement blades, ensure they are specifically designed for Cub Cadet mowers. Look for blades that meet or exceed the original equipment manufacturer (OEM) specifications. Avoid using generic or universal blades, as they may not fit properly or provide the same level of performance. Check for blade balance before installation.
Balancing the New Blades

Before installing new blades on your Cub Cadet mower, it’s crucial to balance them. An unbalanced blade can cause excessive vibration, leading to premature wear on the mower’s spindle, bearings, and other components. Furthermore, it can result in an uneven cut and a less aesthetically pleasing lawn. Balancing blades is a simple process that can significantly extend the life of your mower and improve its performance.
To balance a blade, you’ll need a blade balancer, which can be purchased at most hardware or lawn care stores. The balancer typically consists of a cone-shaped spindle that allows the blade to rotate freely; Place the blade on the balancer, ensuring the center hole is properly aligned. If one side of the blade is heavier, it will tilt downwards.
To correct the imbalance, carefully grind or file away small amounts of metal from the heavier side of the blade. Periodically recheck the balance until the blade remains horizontal on the balancer. Take care not to remove too much material, as this can weaken the blade. A properly balanced blade will significantly improve the overall performance and longevity of your Cub Cadet mower.
Installing the New Blades
With the new blades balanced and ready, the next step is proper installation onto your Cub Cadet mower. Ensure the mower is turned off, the spark plug is disconnected, and you’re wearing protective gloves. Carefully position the blade onto the spindle, ensuring the correct side faces the ground. Most blades have markings indicating the proper orientation; typically, the side marked “bottom” or “grass side” should face down.
Next, align the blade with the spindle bolt hole. Reinstall the blade bolt, washer, and any other hardware that was removed during the removal process. Hand-tighten the bolt initially to ensure proper alignment. Before final tightening, double-check that the blade is correctly seated against the spindle.
Using a torque wrench, tighten the blade bolt to the manufacturer’s specified torque. This is crucial for ensuring the blade is securely attached and prevents it from loosening during operation. Over-tightening can damage the bolt or spindle, while under-tightening can lead to blade detachment and potential hazards. Refer to your Cub Cadet owner’s manual for the correct torque specification. Once tightened, give the blade a gentle spin to ensure it rotates freely without any obstructions. Repeat this process for each blade on your mower deck.

Tightening the Blade Bolts to the Correct Torque
Achieving the correct torque when tightening blade bolts is absolutely essential for safe and effective operation of your Cub Cadet mower. Under-tightened bolts can loosen during use, leading to blade detachment, vibration, and potential damage to the mower or serious injury. Over-tightening can strip the threads on the bolt or spindle, weakening the connection and also leading to failure.
Consult your Cub Cadet owner’s manual to find the precise torque specification for your specific mower model. This value is typically measured in foot-pounds (ft-lbs) or Newton-meters (Nm). A torque wrench is indispensable for this task; using a standard wrench and guessing is highly discouraged.
Attach the appropriate socket size to your torque wrench and carefully tighten the blade bolt. As you tighten, watch the torque wrench dial or display until you reach the specified torque value. The wrench will typically click or provide another indication when the correct torque is achieved. Avoid exceeding the specified torque. After tightening, double-check each bolt to ensure accuracy. This meticulous approach ensures the blades are securely fastened, promoting safe and optimal cutting performance for your Cub Cadet mower.

Post-Installation Check and Adjustments
Following the blade installation on your Cub Cadet mower, a thorough post-installation check is crucial to ensure safety and optimal performance. Begin by visually inspecting each blade to confirm it is correctly seated on the spindle and that the bolts are securely tightened to the specified torque. Double-check that the blades are not making contact with any part of the mower deck when rotated manually.
Next, carefully rotate each blade by hand to ensure free movement without any obstructions or unusual noises. If you encounter any resistance, re-examine the installation and make necessary adjustments. Start the mower in an open area, away from people and objects, and listen for any unusual vibrations or sounds emanating from the mower deck.
If vibrations are present, immediately stop the mower and re-check the blade balance and bolt tightness. If the mower seems to be running smoothly, perform a test cut on a small area of your lawn. Observe the quality of the cut, ensuring that the grass is being cut evenly and cleanly. Uneven cutting may indicate that one or more blades are not properly aligned or balanced. Addressing these issues promptly will extend blade life and ensure a pristine lawn.
Maintenance Tips for Blade Longevity
To maximize the lifespan of your Cub Cadet mower blades and maintain a healthy lawn, consistent maintenance is essential. Regularly inspect the blades for signs of wear, such as dullness, bending, or cracking. Sharpening the blades periodically will help maintain a clean cut and reduce stress on the mower’s engine. Ideally, blades should be sharpened after every 25 hours of use, or at least twice a season.
Before each mowing session, clear your lawn of any debris, such as rocks, sticks, and other hard objects, that could damage the blades. Avoid mowing over areas known to contain hidden obstacles. After each use, clean the blades thoroughly with a wire brush to remove grass clippings and buildup. This prevents corrosion and ensures efficient cutting.
Store your mower in a dry, sheltered place to protect the blades from rust and environmental damage. At the end of the mowing season, consider applying a rust-inhibiting coating to the blades before storing them. Following these simple maintenance tips will significantly extend the life of your Cub Cadet mower blades, saving you time and money in the long run while also ensuring a well-manicured lawn.
Troubleshooting Common Issues
Even with careful blade replacement, you might encounter common issues. If the mower vibrates excessively after blade installation, it’s likely due to unbalanced blades. Re-balance the blades using a blade balancer, or replace them with a balanced set. A mower that leaves an uneven cut could indicate incorrectly installed blades, a bent spindle, or a damaged deck. Double-check blade alignment and inspect the spindle and deck for damage.
If you experience difficulty tightening the blade bolts, ensure the threads are clean and undamaged. Applying a small amount of lubricating oil can help. Stripped threads may require replacing the bolt or spindle. If the blades keep coming loose during operation, inspect the blade bolt and spindle for wear. Use the correct torque specifications from your operator’s manual when tightening.
A knocking sound suggests loose blades or debris caught in the deck. Immediately stop the mower, disconnect the spark plug, and inspect the blades and deck. If you find the mower struggling to cut through grass, even with sharp blades, it could be due to a clogged deck. Clean the underside of the deck to improve airflow. Consulting your Cub Cadet operator’s manual is always recommended for model-specific troubleshooting.
