
The Honeywell 6000 Series Thermostat offers a smart, energy-efficient solution for home comfort. This guide provides a comprehensive overview of its installation, configuration, and operation.
Proper installation ensures optimal performance and safety, making it essential to follow the steps carefully. This manual is structured to guide you through preparation, setup, and testing.
1.1 Overview of the Honeywell 6000 Series Thermostat
The Honeywell 6000 Series Thermostat is a smart, energy-efficient solution designed for home comfort. It features programmable scheduling, Wi-Fi connectivity, and compatibility with various HVAC systems. The thermostat is user-friendly, offering intuitive controls and customizable settings. It supports systems like 1 Heat/1 Cool, making it versatile for different home setups. Models such as TH6110D and TH6220D cater to specific system requirements. This thermostat ensures optimal performance, energy savings, and seamless integration with smart home systems. The manual provides detailed guidance for installation, configuration, and operation, ensuring a smooth setup process for both new and experienced users.
1.2 Importance of Proper Installation
Proper installation of the Honeywell 6000 Series Thermostat is critical for ensuring safety, efficiency, and optimal performance. Incorrect installation can lead to system malfunctions, safety hazards, or reduced energy efficiency. Following the manufacturer’s guidelines and safety precautions is essential to avoid potential risks. A qualified technician should handle the installation to guarantee compliance with local regulations and proper integration with existing HVAC systems. This ensures the thermostat operates as intended, providing reliable temperature control and energy savings. Proper setup also extends the product’s lifespan and maintains warranty validity, making it a crucial step for long-term satisfaction and functionality.

Pre-Installation Requirements
Pre-installation requirements ensure compatibility, safety, and proper preparation. Check system compatibility, gather necessary tools, and ensure electrical safety. Follow manufacturer guidelines for a smooth setup.
2.1 Compatibility Check for Honeywell 6000 Series
Ensure the Honeywell 6000 Series thermostat is compatible with your HVAC system. Verify the system type (gas, electric, heat pump) and stage compatibility (e.g., two-stage heating). Check voltage requirements (24V AC) and wiring configuration. Confirm the system matches the thermostat’s terminal requirements. Refer to Honeywell’s official documentation for a detailed list of compatible systems. If unsure, consult a professional to avoid installation issues. Proper compatibility ensures optimal performance and efficiency. Always verify local regulations and manufacturer guidelines before proceeding.
2.2 Tools and Materials Needed
To install the Honeywell 6000 Series thermostat, you will need specific tools and materials. Essential tools include a screwdriver (Phillips and flathead), wire strippers, pliers, and a voltage tester. Materials required are the thermostat unit, wallplate, mounting screws, wire connectors, and possibly wall anchors. Ensure you have a ladder or step stool for safe access. Additional items like a pencil and tape measure may be useful for marking walls. Always refer to Honeywell’s official documentation for any model-specific requirements. Gather all tools and materials beforehand to streamline the installation process and ensure safety.
2.3 Safety Precautions Before Installation
Before installing the Honeywell 6000 Series thermostat, ensure the HVAC system’s power is turned off at the circuit breaker or fuse box. Verify the power is off using a voltage tester to avoid electrical shock. Wear insulated gloves for added protection. If using a ladder, ensure it is stable and secure. Keep children and pets away from the installation area. Do not attempt to install the thermostat if you are unsure about any step. Always follow local electrical codes and safety guidelines. Properly disconnect and label wires to prevent accidental energization of the system during installation.
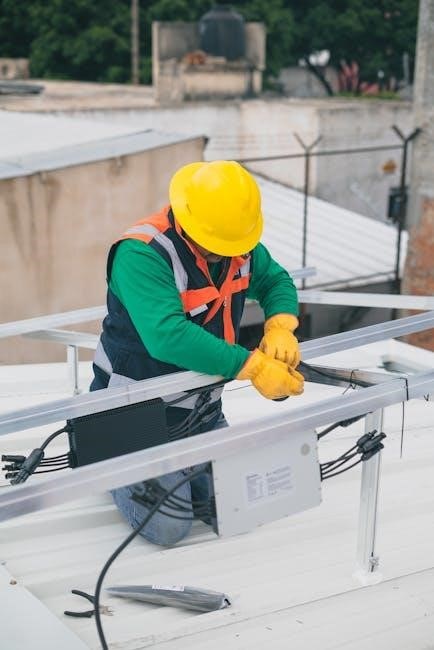
Installation Steps
Mount the wallplate, attach the thermostat, connect wires, and install batteries. Ensure all connections are secure and follow the wiring diagram for proper setup and functionality.
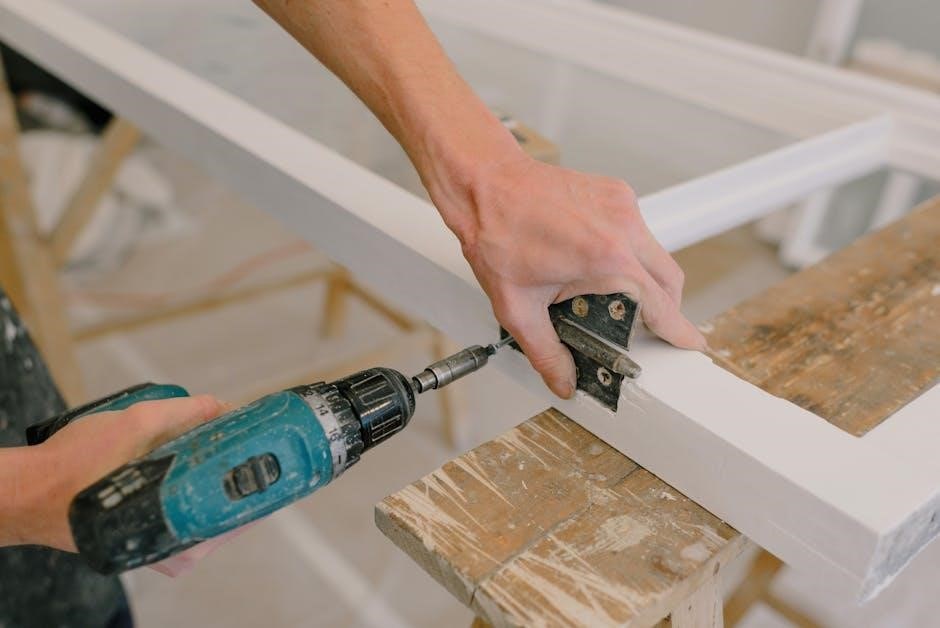
3.1 Wallplate Installation
Begin by turning off power to the HVAC system at the circuit breaker. Remove the existing thermostat and take note of the wiring connections. Mount the wallplate to the wall, ensuring it is level and securely fastened. Use the provided screws or wall anchors for stability. If necessary, mark the wall for drilling and install the anchors. Gently snap the wallplate into place, ensuring it aligns properly with the mounting screws. Double-check that the wallplate is level and firmly attached before proceeding to the next step. Follow the manufacturer’s guidelines for proper alignment and installation.
3.2 Mounting the Thermostat
Once the wallplate is installed, carefully remove the thermostat from its packaging. Align the thermostat with the wallplate, ensuring the mounting tabs or screws line up properly. Gently press the thermostat onto the wallplate until it clicks into place. Secure it using the provided screws if necessary. Ensure the thermostat is level and evenly mounted. Double-check that all connections are properly seated and the thermostat is firmly attached. Follow the manufacturer’s guidelines for correct alignment and mounting to ensure proper functionality. Avoid over-tightening to prevent damage to the thermostat or wallplate.
3.3 Battery Installation and Setup
To install the batteries, locate the battery compartment on the back or bottom of the thermostat. Open the compartment by sliding it open or removing the cover, depending on the model. Insert two AA alkaline batteries, ensuring the polarity matches the diagram inside the compartment. Close the compartment securely. The thermostat’s display should light up, indicating the batteries are installed correctly. Avoid mixing old and new batteries or using different types, as this may affect performance; Once installed, the thermostat will power on, allowing you to proceed with configuration; Proper battery installation ensures reliable operation of the Honeywell 6000 Series Thermostat.
Wiring and Connections
Ensure all wires are securely connected to the correct terminals on the thermostat and HVAC system. Refer to the wiring diagram for accurate connections.
4.1 Understanding the Wiring Diagram
The wiring diagram is a critical visual guide for connecting the Honeywell 6000 thermostat to your HVAC system. It illustrates the layout of terminals, color-coded wires, and their respective functions; Start by identifying the thermostat terminal labels (e.g., R, W, Y, G, C) and match them to your HVAC system’s wiring. Pay attention to the color codes, as they typically indicate specific functions (e.g., red for 24V power, yellow for cooling). Ensure all connections align with the diagram to avoid system malfunctions. Trace each wire carefully from the thermostat to the HVAC unit to confirm proper routing and connections. Always refer to the diagram if unsure about a wire’s purpose or placement. This step is essential for safe and effective installation.
4.2 Connecting the Thermostat to HVAC System
Connecting the Honeywell 6000 thermostat to your HVAC system requires careful attention to wire connections. Start by ensuring the HVAC system is powered off at the circuit breaker. Verify the wiring diagram matches your system’s configuration. Connect the R (24V power) wire to the Rh terminal on the thermostat. The W wire connects to the heating stage, Y to cooling, and G to the fan. If your system has a common (C) wire, attach it to the C terminal. For systems without a C wire, use a jumper between Rh and C. Secure all connections firmly to ensure proper functionality and avoid malfunctions.
4.3 Installing Field Jumper for Emergency Heat
For systems with emergency heat functionality, install the field jumper to enable this feature. Locate the emergency heat terminal on the HVAC system and the corresponding terminal on the Honeywell 6000 thermostat. Cut a length of 18-22 AWG wire and strip both ends. Connect one end to the emergency heat terminal on the HVAC system and the other to the E or EM terminal on the thermostat. Ensure the connections are secure and insulated. Turn the power back on and test the emergency heat function to confirm proper operation. Refer to the wiring diagram for specific terminal designations and configurations.
Configuration and Programming
Configure the Honeywell 6000 thermostat by setting up the initial parameters, emergency heat options, and zoning panel connections. Follow the on-screen prompts for precise customization and optimal performance.
5.1 Initial Configuration of the Thermostat
Start by powering on the thermostat and following the on-screen prompts. Set the temperature scale (°F or °C), date, time, and system type (heat/cool). Use the touchscreen interface to navigate through the menu. Configure basic settings like HVAC system type, fan operation, and temperature differential. Review and adjust default settings to match your preferences. Ensure the thermostat is set to the correct mode (heating or cooling) based on your system. Save all configurations to ensure proper operation. This initial setup lays the foundation for advanced features and ensures the thermostat functions efficiently with your HVAC system.
5;2 Setting Up Emergency Heat Configuration
Access the thermostat menu and navigate to the emergency heat settings. Select the emergency heat option to enable it for your system. Ensure the wiring connections for the emergency heat stage are correctly configured. If your system requires a field jumper for emergency heat, install it as specified in the wiring diagram. Set the temperature threshold for emergency heat activation, typically a few degrees below the normal heating setpoint. Test the emergency heat function by lowering the temperature below the threshold to ensure it activates properly. Save the configuration to ensure the emergency heat operates correctly during power outages or primary heat failure.
5.3 Connecting to Honeywell Zoning Panels
Access the zoning settings in the thermostat menu and enable the zoning feature. Select the number of zones supported by your system. Configure each zone by assigning the appropriate sensors and dampers. Ensure the Honeywell zoning panels are properly connected to the thermostat and HVAC system. Verify wiring compatibility between the thermostat and zoning panels. Test the zoning functionality by activating each zone individually to ensure proper operation. Save the configuration to maintain zoning settings. This setup allows precise temperature control across multiple zones for enhanced energy efficiency and comfort.

System Testing
After installation, test the heating, cooling, and fan systems to ensure proper operation. Verify thermostat responsiveness and accuracy. Check all zoning functionalities if connected. Ensure emergency heat works correctly. Test system performance across different modes to confirm reliability and efficiency. Address any issues promptly to avoid operational disruptions.
6.1 Testing Heating System
Turn the thermostat to heat mode and set the temperature 5°F above the current room temperature. Verify the HVAC system activates and warms the space; Check for proper temperature rise and system responsiveness. Ensure there are no error messages or irregular operation. Test the system in both auto and manual modes to confirm consistency. Verify that the thermostat accurately maintains the set temperature. If issues arise, review connections and settings. This step ensures the heating system functions correctly with the Honeywell 6000 thermostat before proceeding to other tests.
6.2 Testing Emergency Heat Functionality
Set the thermostat to emergency heat mode and ensure the system activates. Verify the temperature rises steadily and reaches the set point. Check that only the emergency heat source operates, without auxiliary heat engagement. Monitor the thermostat display for error messages. If the system performs correctly, emergency heat functionality is confirmed. This test ensures reliable backup heating during primary system failures. Proper operation is critical for maintaining comfort and safety. Ensure all components function as intended before finalizing the installation.
6.3 Testing Cooling and Fan Operation
Set the thermostat to cooling mode and lower the temperature below the current room temperature to activate the cooling system. Verify the AC unit starts and runs smoothly. Ensure the thermostat accurately controls the cooling operation and maintains the set temperature. Check the fan operation by selecting the “Fan” or “Continuous Fan” option. Listen for unusual noises that may indicate issues. Ensure the fan operates correctly with and without cooling. Test the system’s ability to cycle on and off properly. Confirm that the cooling and fan functions shut off when the desired temperature is reached or the system is turned off.
Maintenance and Troubleshooting
Regularly clean the thermostat and check HVAC system performance. Replace air filters and inspect wiring for wear. Address issues promptly to prevent system damage or inefficiency.
7.1 Regular Maintenance Tips
Perform routine maintenance to ensure optimal performance. Clean the thermostat display and sensors regularly using a soft cloth. Check and replace batteries every 12 months or as needed. Inspect wiring connections for wear or damage. Ensure proper airflow by cleaning HVAC vents and filters every 1-3 months. Update thermostat software periodically for improved functionality. Test temperature calibration annually to maintain accuracy. Schedule professional HVAC system checks to identify potential issues early. Regular maintenance helps prevent malfunctions, ensures energy efficiency, and extends the lifespan of your Honeywell 6000 Series thermostat.
7.2 Troubleshooting Common Issues
Address common issues promptly to maintain system performance. If the thermostat doesn’t turn on, check battery levels or wiring connections. For incorrect temperature readings, recalibrate the sensor. A blank or unresponsive screen may require resetting the device. If heating or cooling isn’t engaging, verify HVAC system compatibility and ensure proper wiring. Check for software updates to resolve connectivity issues. Refer to the Honeywell 6000 Series manual for detailed diagnostic steps. If problems persist, contact Honeywell support or a certified technician. Regular troubleshooting ensures reliable operation and minimizes downtime for your thermostat.
7.3 Battery Replacement Guidelines
Replace batteries in your Honeywell 6000 Series thermostat as needed to maintain operation. Use two fresh AA alkaline batteries for optimal performance. Turn off power to the thermostat at the circuit breaker before starting. Gently pull the thermostat from the wallplate to access the battery compartment. Remove the old batteries and insert the new ones, ensuring correct polarity. Reattach the thermostat to the wallplate and restore power. Test functionality to confirm proper operation. Replace batteries every 12-18 months or when the low-battery indicator appears. Avoid mixing old and new batteries to prevent performance issues. Proper disposal of used batteries is recommended.
Advanced Features
- Explore Wi-Fi connectivity for remote control via Honeywell Home app.
- Program schedules to optimize energy efficiency and comfort.
- Integrate with smart home systems like Amazon Alexa.
- Utilize geofencing for location-based temperature adjustments.
- Access advanced energy reports for usage insights.
8.1 Wi-Fi Connectivity Setup
To enable Wi-Fi connectivity for the Honeywell 6000 Series Thermostat, start by downloading and installing the Honeywell Home app. Ensure your thermostat is in Wi-Fi setup mode, typically indicated by an LED or on-screen prompt. Open the app, select “Add Device,” and choose your thermostat model. Connect to the thermostat’s temporary Wi-Fi network, then select your home network from the list and enter the password. Once connected, the thermostat will automatically update its firmware. Use the app to control temperature settings, receive notifications, and integrate with smart home systems. This feature enhances convenience and remote accessibility for optimal comfort management.
8.2 Programming Schedule for Energy Efficiency
Program a custom schedule using the Honeywell Home app to optimize energy usage. Set temperature adjustments based on daily routines, such as lowering the temperature when sleeping or away from home. Enable geofencing to automatically adjust settings when you leave or arrive. Use the “Smart Response” feature to learn your system’s behavior and improve efficiency. Schedule different settings for weekdays and weekends, and apply energy-saving modes during peak hours. Regularly review and adjust your schedule to ensure maximum energy savings while maintaining comfort. This feature helps reduce energy waste and lowers utility bills without compromising convenience.
8.3 Integrating with Smart Home Systems
The Honeywell 6000 Series Thermostat seamlessly integrates with popular smart home systems like Amazon Alexa and Google Home. Use voice commands to adjust temperatures or settings effortlessly. Additionally, the thermostat can be connected to IFTTT (If This Then That) for custom automations. Integration allows the thermostat to work alongside other smart devices, such as lights and security systems, creating a unified smart home experience; This connectivity enhances convenience and efficiency, enabling remote monitoring and control through the Honeywell Home app. Ensure your smart home setup is compatible with the thermostat for optimal performance and functionality.
Safety and Compliance
Adhere to safety guidelines and ensure compliance with local regulations. Handle electrical components safely and follow the manual’s instructions to avoid any potential hazards.
9.1 Adhering to Safety Guidelines
Always follow safety guidelines to prevent accidents and ensure proper installation. Turn off the power supply before starting work. Use insulated tools and avoid damaged wires to prevent electrical shocks. Keep the area clear of flammable materials and ensure proper ventilation. Wear safety gear, such as gloves and goggles, to protect yourself; Handle the thermostat and HVAC components with care to avoid damage. Follow the manufacturer’s instructions and local safety codes. Regularly inspect tools and equipment for wear and tear. If unsure about any step, consult a licensed professional to maintain safety standards throughout the installation process.
9.2 Compliance with Local Regulations
Ensure the installation of the Honeywell 6000 Series thermostat complies with local building codes and regulations. Verify the system meets all applicable standards for electrical and HVAC installations. Obtain necessary permits before starting the project. Familiarize yourself with local laws regarding energy efficiency and safety. Adhere to guidelines set by authorities like the International Electrotechnical Commission (IEC) or Underwriters Laboratories (UL). Properly document the installation process for compliance verification. If unsure, consult local regulatory bodies or licensed professionals to ensure adherence to all legal requirements. Compliance guarantees safety, efficiency, and avoids potential legal issues.
9.3 Handling Electrical Components Safely
When handling electrical components during the Honeywell 6000 installation, always prioritize safety. Ensure the power supply is turned off at the circuit breaker before starting work. Use a voltage tester to confirm the system is de-energized. Wear insulated gloves and safety goggles to protect against electrical shocks. Avoid wearing jewelry that could conduct electricity. Properly ground all components to prevent static discharge. Inspect wires and connectors for damage; replace any worn or frayed parts. Work in a dry environment to minimize the risk of short circuits. Follow manufacturer guidelines for handling specific electrical parts. If unsure, consult a licensed electrician to ensure safe installation.
Successful installation ensures efficient HVAC operation and enhanced comfort. Follow all guidelines for optimal performance and safety. Proper setup guarantees a seamless user experience always.
10.1 Summary of Key Installation Steps
To ensure a smooth setup, start with compatibility checks and safety precautions. Install the wallplate securely, then mount the thermostat. Connect wires carefully, following the diagram. Configure settings like emergency heat and zoning. Test all functions to confirm proper operation. Regular maintenance and adherence to safety guidelines will ensure long-term efficiency and reliability. Always refer to the official manual for detailed instructions and troubleshooting tips. Proper installation guarantees optimal performance and user satisfaction, making the Honeywell 6000 Series a reliable choice for temperature control.
10.2 Final Check Before System Operation
Before operating the Honeywell 6000 Series thermostat, perform a final check to ensure proper installation and configuration. Verify all electrical connections are secure and comply with local codes. Ensure the thermostat is mounted level and all wires are connected correctly. Check that the HVAC system responds to temperature adjustments. Confirm emergency heat settings are programmed and safety features are enabled. These final checks ensure safe, efficient, and intended system operation.
References
Honeywell Official Documentation: Refer to the Honeywell 6000 Series thermostat user manual for detailed instructions and technical specifications.
Additional Resources: Visit Honeywell’s official website for wiring diagrams, troubleshooting guides, and compatibility charts.
Recommended Tools: Consult the tools and materials list provided in the manual for optimal installation and maintenance.
11.1 Honeywell Official Documentation
The Honeywell 6000 Series installation manual provides comprehensive guidance for installing, configuring, and maintaining the thermostat. It includes detailed wiring diagrams, step-by-step instructions, and troubleshooting tips. The manual covers essential aspects such as compatibility checks, system requirements, and safety precautions. Additionally, it offers insights into advanced features like Wi-Fi connectivity and smart home integration. Referencing the official documentation ensures compliance with manufacturer recommendations, optimizing performance and longevity of the thermostat. Always consult the latest version available on Honeywell’s official website for the most accurate and up-to-date information. This resource is indispensable for both professionals and DIY installers;
11.2 Recommended Tools and Resources
For a successful installation of the Honeywell 6000 Series thermostat, ensure you have the right tools and resources. Essential tools include a screwdriver, wire strippers, and a voltage tester. A multimeter is recommended for advanced diagnostics. Honeywell’s official website provides detailed installation manuals, wiring diagrams, and troubleshooting guides. Additionally, Honeywell-authorized distributors offer genuine replacement parts and accessories. Online forums and HVAC communities can provide peer support and tips; Always refer to Honeywell’s official documentation and use recommended tools to ensure safety and system compatibility. Manufacturer-approved resources are crucial for maintaining warranty validity and optimal performance.